 |
 |
 |
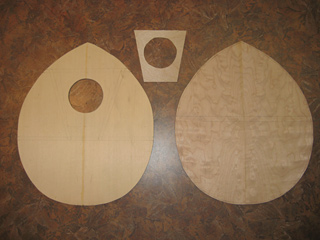
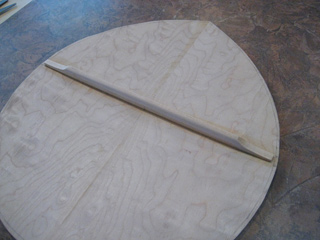
| Top and bottom of mandolin is made by joining your two pieces of tonewood.
Square the edges by using a shooting board.
Once the two pieces are joined, cut the outline of the top and bottom. Leave approximately 1/8" outline the line.
You will trim this later when the top is joined to the sides. Prepare a piece of 1/32" ply as a backing reinforcement for
the sound hole. |
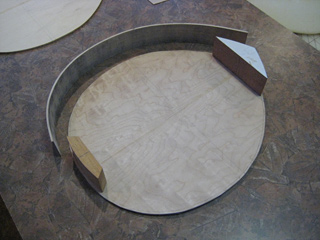
Cut the head and heel block from solid hardwood. The mandolin sides are cut to width and approximately
length and then shaped by bending over a heated pipe. See information on how to do this
here |
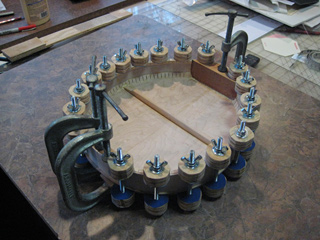
Once the side are bent, clamp them in a fixture till they have dried. The fixture for assembling
the mandolin body is made of two layers of 3/4" plywood cut in the shape of the mandolin body. The fixture is not essential
but helps, especially if you plan on building more than one mando. Make an internal form out of 3/4" plywood that is the
exact shape of the mandolin body (minus the thickness of the sides). This will help push the mandolin sides against the
outside frame when gluing. |
 |
 |
 |
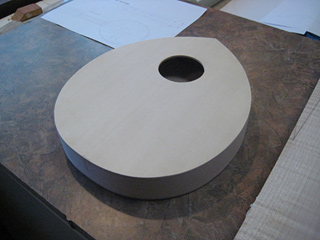
| Mandolin top shown with 1/32" ply reinforcing patch glued in place. Use tightbond glue for
all glue joints. You can build this style mandolin with a round, oval or "f-holes". |
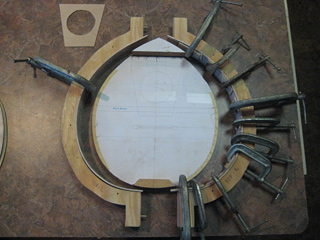
Another photo showing the side strips being shaped in the fixture prior to gluing in the
kerfed reinforcing strips. The fixture is not essential but helps, especially if you plan on building more than one mando.
Make an internal form out of 3/4" plywood that is the exact shape of the mandolin body (minus the thickness of the sides).
This will help push the mandolin sides against the outside frame when gluing. |
Glue the head and heel blocks to the mandolin sides. |
 |
 |
 |
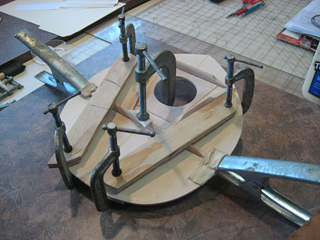
| Shape the tonebars (internal braces) as shown on the plans. There is one brace glued to the
mandolin back and four to the top. This photo shows the back brace glued in place. Note, that the braces have a radius
on the edge that is glued to the face or back. This radius is shown on the plan. |
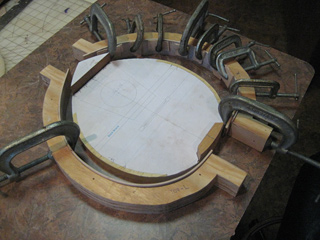
The head and heel block have been glued to the sides and the internal 3/4" plywood form is
in place. The kerfed lining strips are ready to glue to the sides. |
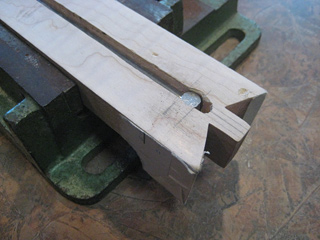
Detail of the body head. Cut the mandolin side strip out of the notch where the
neck dove-tail will go. The 1/2" wide notch must be cut accurately so the neck will align properly with the mandolin body. |
 |
 |
 |
| The tonebars are glued to the mandolin top. The tonebars provide reinforcing in the stress points of
the top and help create the sound profile of the instrument. |
The head and heel block have been glued to the sides and the internal 3/4" plywood form is
in place. The kerfed lining strips are ready to glue to the sides. |
Glue the kerfed lining strips to the mandolin rims (sides) one piece at a time (four pieces). Use
lots of close pins to hold in place. NOTE: Keep the top edge of the kerf strip about 1/32" above the top of the side. This
will be sanded away later at a slight angle to account for the arch in the top and back. |
 |
 |
 |
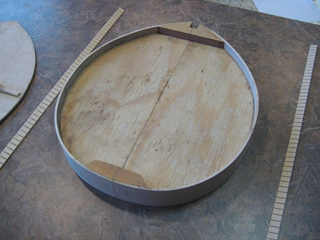
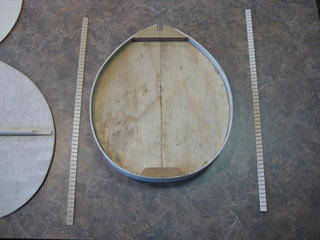
| This photo shows the kerfed lining strip glued in place. The mandolin "rim" is now ready
for the top and back to be glued in place. |
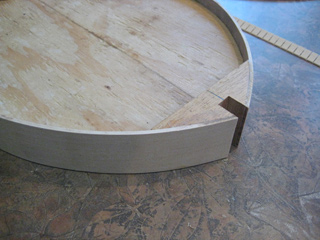
Another photo showing the rim and the back (with one brace). The back will be glued to the rim first.
Prior to gluing the top and bottom to the rim, use a long sanding block (approximately 18"x1 1/2" long)
to sand to edge of the rim where the kerfed lining is above the mandolin edge. On one side of the sanding block glue
a 1/4" thick block. This edge rests on one side of the mandolin body while the other end (with the sandpaper glued to it) lays
against the rim. This sands the edge at a very slight angle. Be careful not to sand away any of the mandolin side. Just the
kerf lining that extends above the rim. |
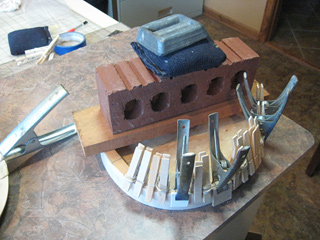
Use a lot of clamps to hold the top (and back) to the rim while the glue dries. You can make a bunch of
clamps out of two disks of 3/4" plywood 1 1/4" in diameter and a 3 1/2"x1/4" lag bolt with a wing nut. Glue a pad of felt or
leather to one side of the disk to protect whatever you are gluing together. |
 |
 |
 |
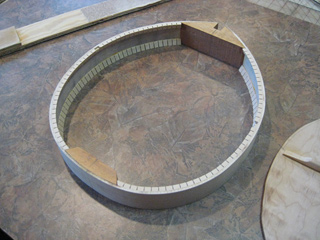
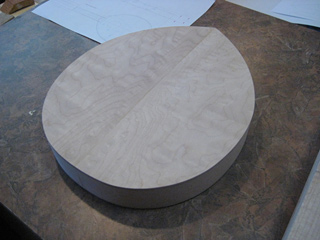
| Photo of the completed mandolin body top side up. |
Photo of the completed mandolin body back side. If you are going to put a binding on the mandolin
body, now is the time to route the channel and glue it in place. Search the internet for information on installing bindings,
pearl inlays, preparing a fretboard. This brief pictorial tutorial is not intended as a step-by-step guide. |
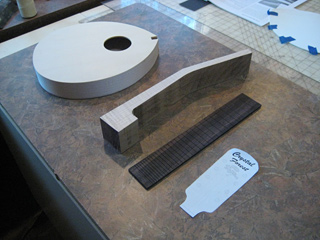
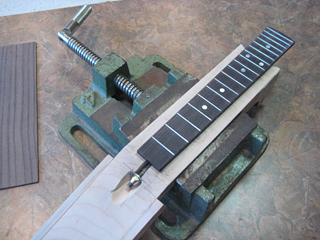
This photo shows the rough cutout of the mandolin neck (prior to shaping) and the raw pre-slotted
fretboard prior to installing fretwire. |
 |
 |
 |
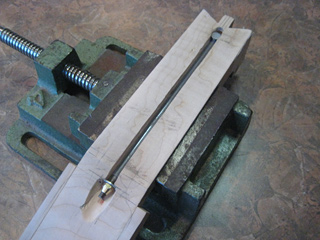
| If you want to install a truss rod in the mandolin neck, now is the time to do it. A truss rod
is not absolutely necessary, but on "fine" instruments it provides a way to adjust the "relief" in the
neck later.... should that be necessary. |
You will need to cut/route a 1/4" wide slot in the neck and install it. Consult other resources for information on
how to install a truss rod. Route the peghead for the truss rod nut. This will be covered by a truss rod cover plate when the
mandolin is finished. |
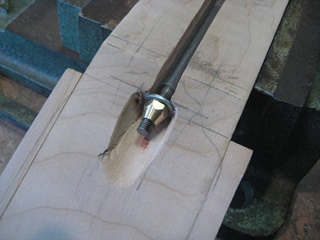
Detail of the neck heel end showing the other end of the truss rod. You will need to drill a recess
here for the lug end of the truss rod. |
 |
 |
 |
| Prior to putting the fretboard on the mandolin neck you will want to cover over the truss rod installation
by gluing in a strip of hardwood filler. This photos shows the fretboard with the fretwires installed and pearl dots added. |
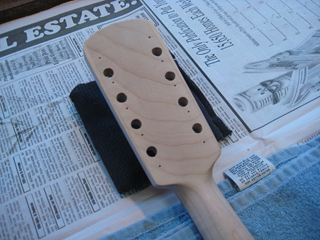
Detail showing the back of the peghead after shaping and sanding. The plans show outlines and cross sections
for shaping the mandolin neck and peghead. |
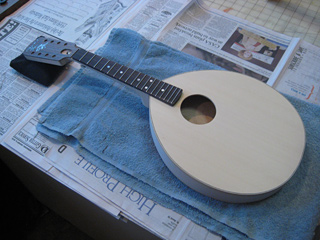
This photo show the completed mandolin ready for finishing. This particular mandolin had a rosewood
veneer added to the front face of the peghead and a mother of pearl inlay. These are all builder options. |

)
)
)
)
)
)